Let’s ensure your installed software stays up-to-date! We’ll use the Windows Package Manager to quickly find and apply any available updates. Follow the steps below to run the necessary commands using an elevated Command Prompt.
Open Command Prompt as Administrator
Search for CMD in the Start Menu.
Right-click on Command Prompt and select Run as Administrator.
List Available Software Updates
In the Command Prompt, type the following command:
winget upgrade
Press Enter.
This will display all software on your system with available updates.
Install All Available Updates
To update everything, enter the following command:
Streamlining Windows Image Preparation with the Power of PowerShell: An In-depth Look at the Remarkable Windows10Debloater Script
Windows image preparation can be tedious, requiring the removal of unnecessary apps and settings. The Windows10Debloater script by Sycnex simplifies this process, offering automation, precision, and customization. Here’s how this tool makes image preparation more efficient and effective for IT professionals and tech enthusiasts.
Why Use Windows10Debloater?
Efficient Debloating: Removes unnecessary apps and components to optimize system performance, creating leaner and faster Windows images.
Customizable Options: Adjust settings to meet specific needs—whether removing specific apps or adjusting privacy settings.
User-Friendly Interface: Offers both a PowerShell script for advanced users and an intuitive GUI for beginners.
Safety Measures: Creates system backups with a restoration option, ensuring any changes are reversible.
Scalable Efficiency: Ideal for managing multiple machines, saving time while ensuring consistency across devices.
Key Benefits for IT Professionals
Time Savings: Streamlines image preparation with minimal manual effort.
Consistency: Enables uniform system setups for large-scale deployments.
Reliability: Provides clear documentation and failsafe features for peace of mind.
Getting Started
Download Windows10Debloater from its GitHub repository, run the script, and choose between default or customized settings. The documentation is straightforward, making it easy to use regardless of experience level.
Conclusion
Windows10Debloater redefines Windows image preparation, blending automation and flexibility to improve efficiency. Whether you’re a tech enthusiast or an IT professional, this tool simplifies the process and ensures consistent, optimized results.
When you’re dealing with an Azure Domain and you end up needing to rejoin a computer to the domain, things can get a bit tricky, especially if you’ve renamed the PC after it joined the domain. Here’s the deal: sometimes, even after you’ve changed the computer name, the old one still shows up when you look up the user. Not the most convenient thing, right?
But hey, there’s a couple of cool commands that can save the day in this situation:
dsregcmd /forcerecovery: Alright, imagine this command as a superhero move. It’s like doing a leave-and-join combo in one swift action. First, the computer says “I’m outta here” and leaves the Azure Domain. Then, it immediately rejoins with the new name. This makes sure you don’t end up locked out of the domain without any admin access. But, here’s the kicker: you’ll need to sign in again after this. Think of it as a reset button that sorts out the PC name issue while also ensuring you’ve got the right credentials to hop back in.
dsregcmd /UpdateDevice: Now, this command is like the quick fix in comparison. Instead of the whole leave-and-join drama, it just does a smart update. It’s like changing the sign on a door to match the new room inside. This command directly tells Azure to freshen up its memory about the PC’s identity and its shiny new name.The coolest part? No need to sign in again with this command. It’s a simple, straightforward way to get the new PC name properly registered in Azure. It’s like telling Azure, “Hey, just a heads-up, we’ve got a new name in town.”
So there you have it! These commands are your go-to solutions when the PC name isn’t playing nice in your Azure Domain, especially if renaming was involved. The first command, dsregcmd /forcerecovery, is your all-in-one reset button with a leave-and-join twist. The second one, dsregcmd /UpdateDevice, is your quick update without the fuss. Just pick the one that fits your situation best!
I have been working on a project with GED machines at work, and wanted to share my hair-pulling story. Specifically, the machines that students utilize require a mapped drive for establishing a connection to the proctor/administrative machine in the setup.
During this process, I encountered an unexpected complication. Despite successfully mapping the drive and ensuring that the “remember credentials” option was enabled, the Windows operating system continued to prompt for authentication whenever the application (Delivery Manager) attempted to access the Universal Naming Convention (UNC) path.
In an attempt to troubleshoot and rectify the issue, I proceeded to incorporate the UNC path and corresponding credentials into the Windows Credential Manager. Despite this effort, the recurring authentication demand persisted.
The key revelation that ultimately resolved the matter was the realization that utilizing the syntax “AdminMachine\UserName” within the Credential Manager was essential. This seemingly minor adjustment within the Credential Manager proved to be the critical solution. Once this was implemented, the recurring password prompt ceased to show it’s annoying head, effectively resolving the issue.
This Windows utility seems pretty handy from the testing I have done with it. Go check out Chris’ Website, he has some pretty cool stuff going on https://christitus.com/.
You can run this Utility Software straight from an Admin PowerShell using: irm christitus.com/win | iex
In case you don’t know what these PowerShell commands do (I admit, I was a little shaky on them) here is a breakdown:
IRM
The irm command means “Invoke-RestMethod”.
“The Invoke-RestMethod cmdlet sends HTTP and HTTPS requests to Representational State Transfer (REST) web services that returns richly structured data.” Source
IEX
The iex command stands for “Invoke-Expression”.
“The Invoke-Expression cmdlet evaluates or runs a specified string as a command and returns the results of the expression or command. Without Invoke-Expression , a string submitted at the command line would be returned (echoed) unchanged.”Source
What does it do?
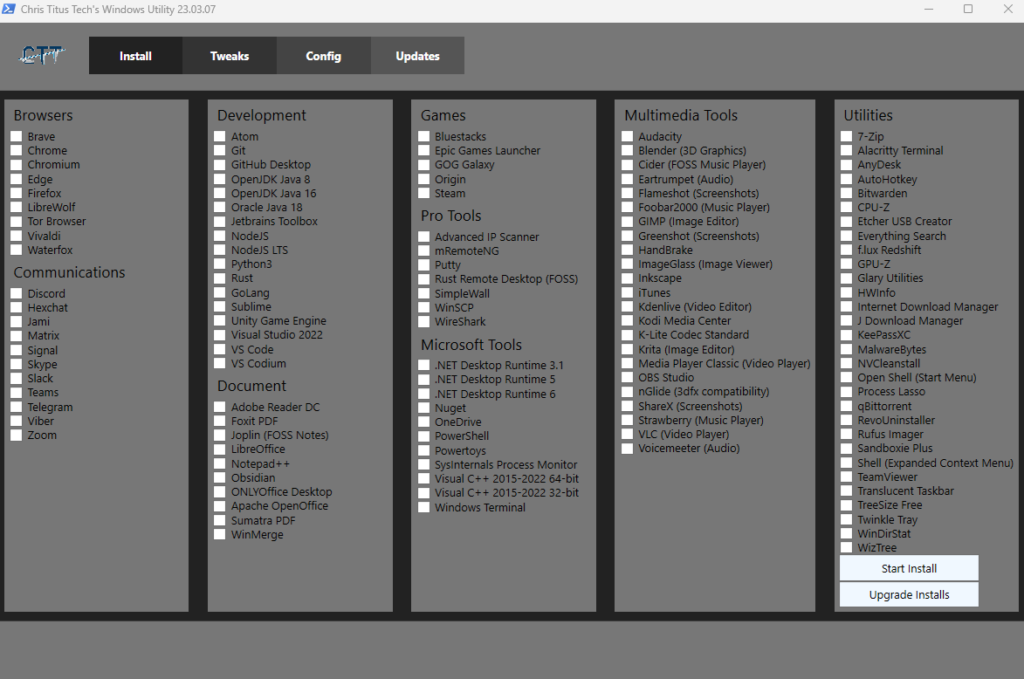
INSTALL
There are several different options for common installs listed here. The categories of software listed are Browsers, Communications, Development, Document, Games, Pro Tools (Very Useful installs), Microsoft Tools, Multimedia Tools, Utilities. The install area reminds me of ninite.com except with more useful tools for sysadmins.
The next gem on this tab is the “Upgrade Installs” button. This button will search your currently installed software and check for updates. If there are updates it automatically install them. I ran this and it updated a lot of software for me! Pretty neat!
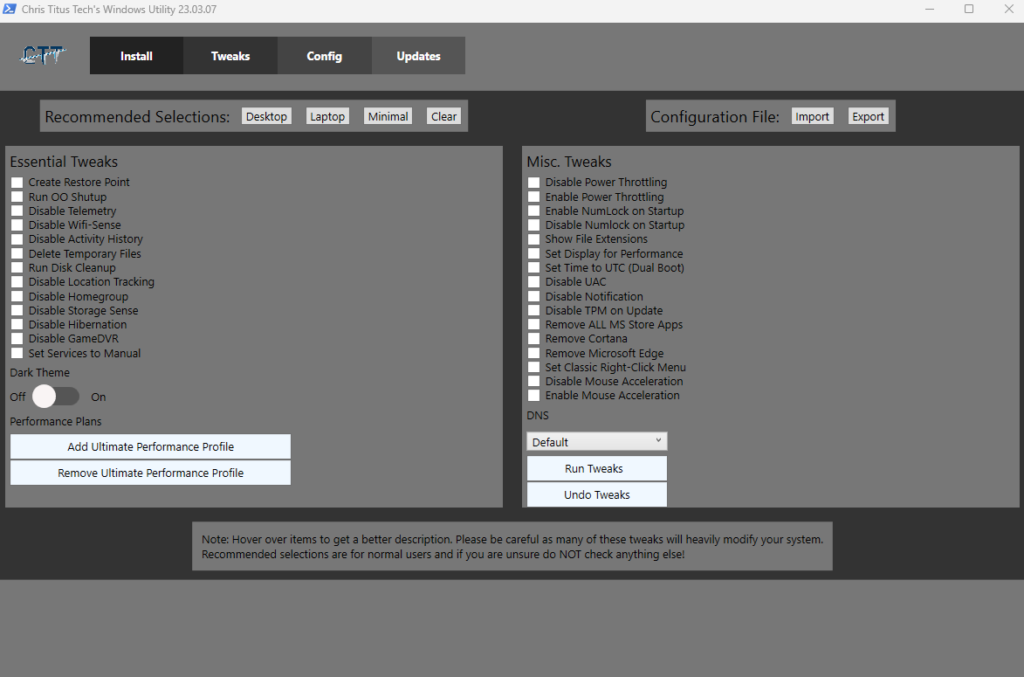
TWEAKS
There are several really good options with the Tweaks tab on the Utility software, most of which I use different PowerShell Scripts to accomplish. Along with all the options there is also a “recommended selections” option that will select the options the Author has deemed to be the best for the system type. Don’t worry about clicking these recommended options, they don’t auto-apply, they just check the options. You still have to manually click the “Run Tweaks” button.
CONFIG
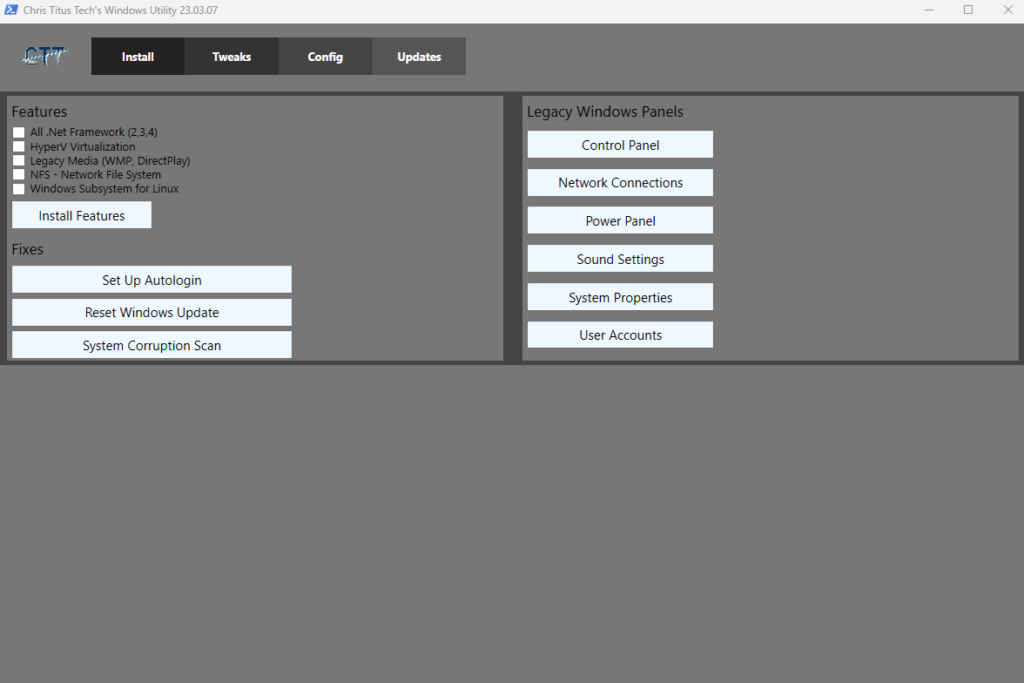
The Config tab just a few options, ranging from Windows Features installer to Windows Fixes and also includes Legacy Control Panel options.
UPDATES
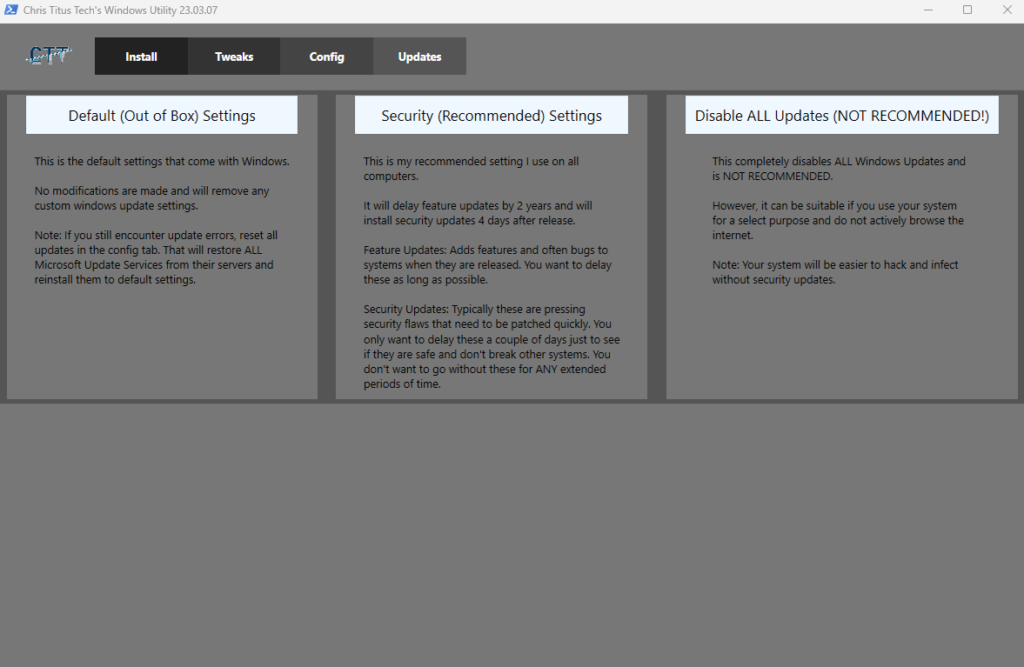
The Updates tab deals with setting Windows Update options. These update options are limited to “Default OOB (Out of Box)”, Security (Recommended), and Disable all updates.
There are a few different ways to create a local account while installing Windows 11 and I will explain a few (for large enterprise environments you should be using Windows Autopilot). The reason you would want to do this is you don’t want to connect your computer to a Microsoft Account. I personally don’t like having a Microsoft account connected to my computer to use it.
You will follow Windows 11 install process until you will come to the screen that asks you to add your Microsoft account.
From here there are three different ways to add a local account:
Out-of-box experience Bypass
At the “Add your Microsoft Account” Page you will;
Press Shift+F10
A Command Prompt will appear
Enter this command: OOBE\BYPASSNRO
The computer will restart and the OOBE (out-of-box experience) will start again
Click the “I don’t have internet” option on the “Let’s connect you to a network”
Click the “Continue with limited setup” option.
A screen should appear that says “Who’s going to use this device?”
Enter your Local Username
Select “Next”
Enter your Local Password
Select “Next”
Releasing IP Address
At the “Add your Microsoft Account” Page you will;
Press Shift+F10
A Command Prompt will appear
Enter this command: ipconfig /release
Close the Command Prompt window
Click the back arrow (located at the top left of the screen)
A screen should appear that says “Who’s going to use this device?”
Enter your Local Username
Select “Next”
Enter your Local Password
Select “Next”
Using Fake Email
At the “Add your Microsoft Account” Page you will;
enter no@notarealdomain.com
Select “Next”
Enter a random password
Select “Sign in”
If this method works you should get to a screen that say “Oops, something went wrong”
Select “Next”
A screen should appear that says “Who’s going to use this device?”
Getting access to Sysinternals quickly can be handy in any Windows environment.
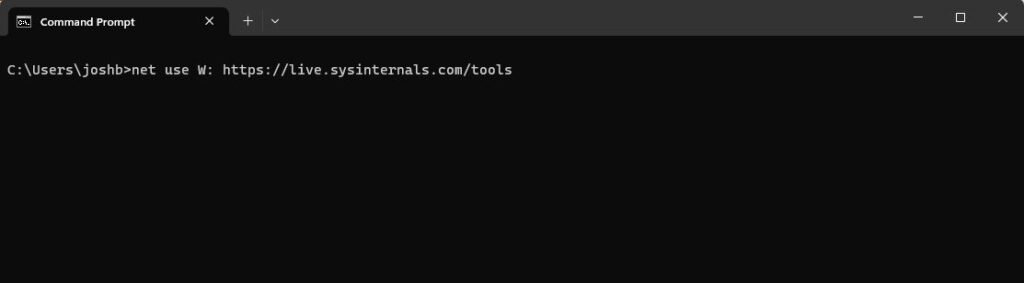
You can add Sysinternals as a mapped drive in Windows by using this command at the Command Prompt (replace the drive letter “W:” with the drive letter of your choosing):